DirectX Shader cache is a system that stores schedules used for improving the performance of games and programs. Sometimes the stored cache data could overflow, resulting in high storage consumption and making DirectX malfunction. If you are also having issues like these, keep reading to know how you can fix them.
Clear DirectX Shader Cache in Windows 11
The DirectX cache is beneficial as it speeds up the application’s load time and improves responsiveness. But if too much cache data is stored, it could make the app malfunction. Below are some methods using which you can clear DirectX Shader Cache:
1 Clear DirectX Shader Cache in Windows 111.1 Clear DirectX Shader Cache From Settings1.2 Clear DirectX Shader Cache From Disk Cleanup1.3 Wrapping Up
Clear DirectX Shader Cache From Settings
Click on Start and open Settings.
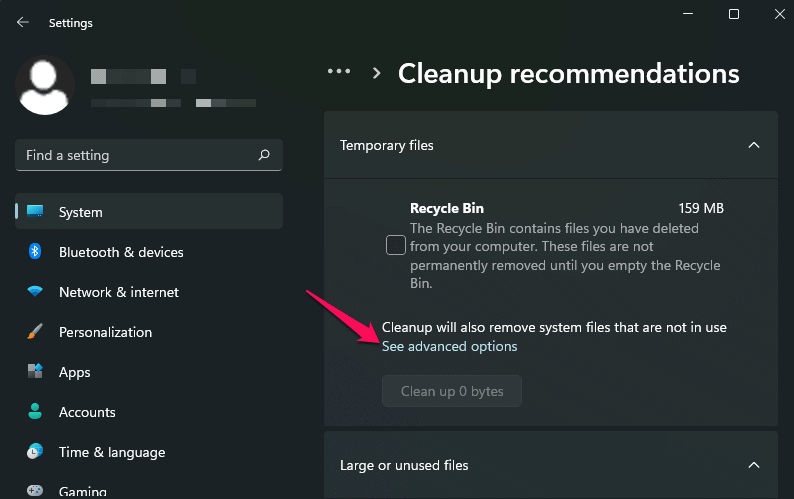
Navigate to System > Storage > Cleanup recommendations.Expand the Temporary files option and click on See advanced options.
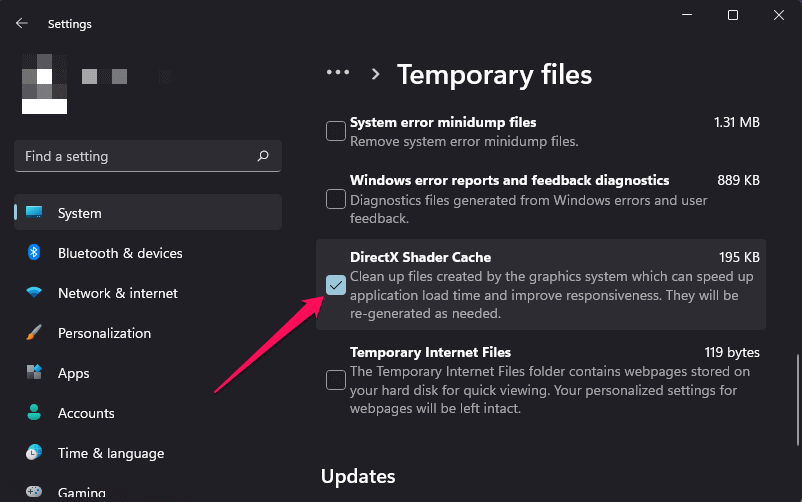
Scroll down and check the option DirectX Shader Cache.
Click on Remove files at the top.
Clear DirectX Shader Cache From Disk Cleanup
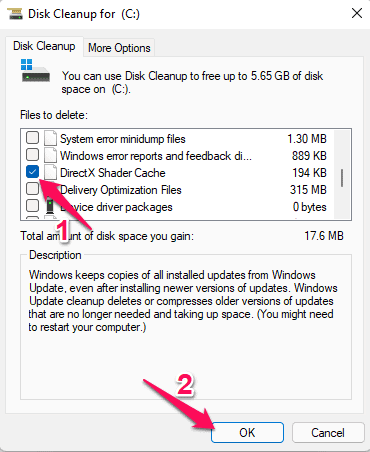
Click on Start, search for Disk Cleanup and click on Run as Administrator.Select the Main Drive and click on the Ok button.In the Disk Cleanup section under Files to delete, scroll down and check DirectX Shader Cache option.
Click on Ok to clear DirectX Shader Cache.
Wrapping Up
This was how you can clear Cache for DirectX Shader in Windows 11. We hope that the steps mentioned above were able to help you. If you still have any issues, feel free to drop a comment below. RELATED GUIDES:
How To Easily Clear Google Chrome Cache on PC, Android, iOSGetting ERR_CACHE_MISS In Google Chrome? Here are the FixesFix Slow Google Chrome Issues On Android 12
Δ