Fix 100% or High CPU Usage In Windows 11
In this article, we’ll go over how to troubleshoot high CPU usage in Windows 11 and how to fix it. We’ve already discussed how to fix the 100% disk issue in Windows 10, you can also read that.
1 Fix 100% or High CPU Usage In Windows 111.1 Restart Your PC1.2 Check The Power Supply1.3 Update Windows1.4 Change Background Usage For Apps1.5 Perform An Antivirus Scan1.6 Update Drivers1.7 Change Power Options2 Conclusion
Restart Your PC
If you are facing high CPU usage in Windows 11, then you can try restarting your PC. Restarting your PC closes all the apps including all the background processes. It lets the system cool down and get going again. Most of the time this may fix the issue. However, if the high CPU usage issue is not due to multiple apps open in the background, then this may prove to be a temporary fix.
Check The Power Supply
Many times faulty power supply may also be the reason behind facing this issue. Try connecting your CPU to a different power socket, and try not using an extension cable if you are facing the issue. If you face any issue while connecting your PC to the extension cable then it may be because of a faulty or low power extension cable/board. Moreover, if you are using a laptop, then check whether you face the issue with either the battery, or when connected to power, or in both cases. You may be able to identify what the issue is. If the problem is not related to the power supply, then you should move to the next step mentioned in this article.
Update Windows
Another thing that you can do to fix 100% CPU usage is by updating Windows. If you are on an outdated version of Windows then you are most likely to face this issue. To update Windows 11, follow the steps given below-
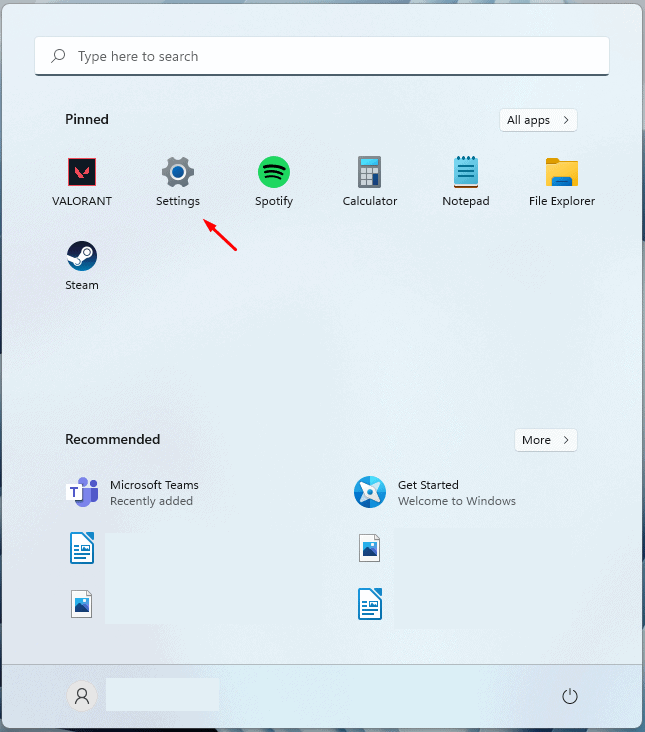
Open the Settings app on your Windows 11 PC. Press the Windows + I key combo and this will open the Settings app.
In the Settings app, click on the Windows Update on the left sidebar. Now on the right side, click on the Check for updates to begin checking for updates.
After doing so, download and install all the updates that your PC finds and then restart your PC. This should most probably fix the high CPU usage issue for you.
Change Background Usage For Apps
If you face the high CPU usage issue in Windows 11, then you should try changing the background usage permissions for the apps. You can change the background usage permissions for the apps that you don’t use frequently. To do so, follow the steps given below-
Open the Settings app, and head to the Apps section from the left sidebar. On the right side, click on the Apps & Features.
Scroll down to the app for which you want to change the background permissions. Click on the three ellipses right next to the app for which you want to change background permissions, and then click on Advanced Options.
On the next screen, head to the Background apps permissions section, and click on the drop-down menu under it.
From the list of options, select Never and the app will not run in the background now.
Do this for all the apps that you don’t use frequently, and you should be able to overcome the high CPU usage issue in Windows 11.
Perform An Antivirus Scan
Another thing that you can try doing is performing an antivirus scan. You are most likely to face this issue due to the virus affecting your PC. If that is the case, then you should probably try performing an antivirus scan, and your issue will be solved. You can use Windows Defender to scan your PC for the virus. If you have a third-party app on your PC, then you can also use that to scan your PC for the virus.
Update Drivers
Outdated drivers may also be the reason behind you facing 100% CPU usage issues in Windows 11. You should try updating the drivers, and you should no longer face the issue. There are various methods to update the drivers on your PC. You can either download the driver update package from the official website of the hardware you use. If you are using a laptop, then you will not have to individually search for the drivers on the internet as you will get the drivers on the official website of your laptop. Third-party driver updaters are another option for updating drivers. You can use this software to update your PC’s drivers automatically. Softwares like Driver Booster or DriverPack Solution to update the drivers on your PC. When you update your PC, your drivers also get updated. When you scan your PC for updates, you will find the drivers update in the optional update section.
Change Power Options
You can also change the power options to fix the issue you are facing. If you have switched your power plan to a lower plan or edited your original plan settings, then you may face the issue. To fix the issue, you should try changing the power options. To do so, follow the steps given below-
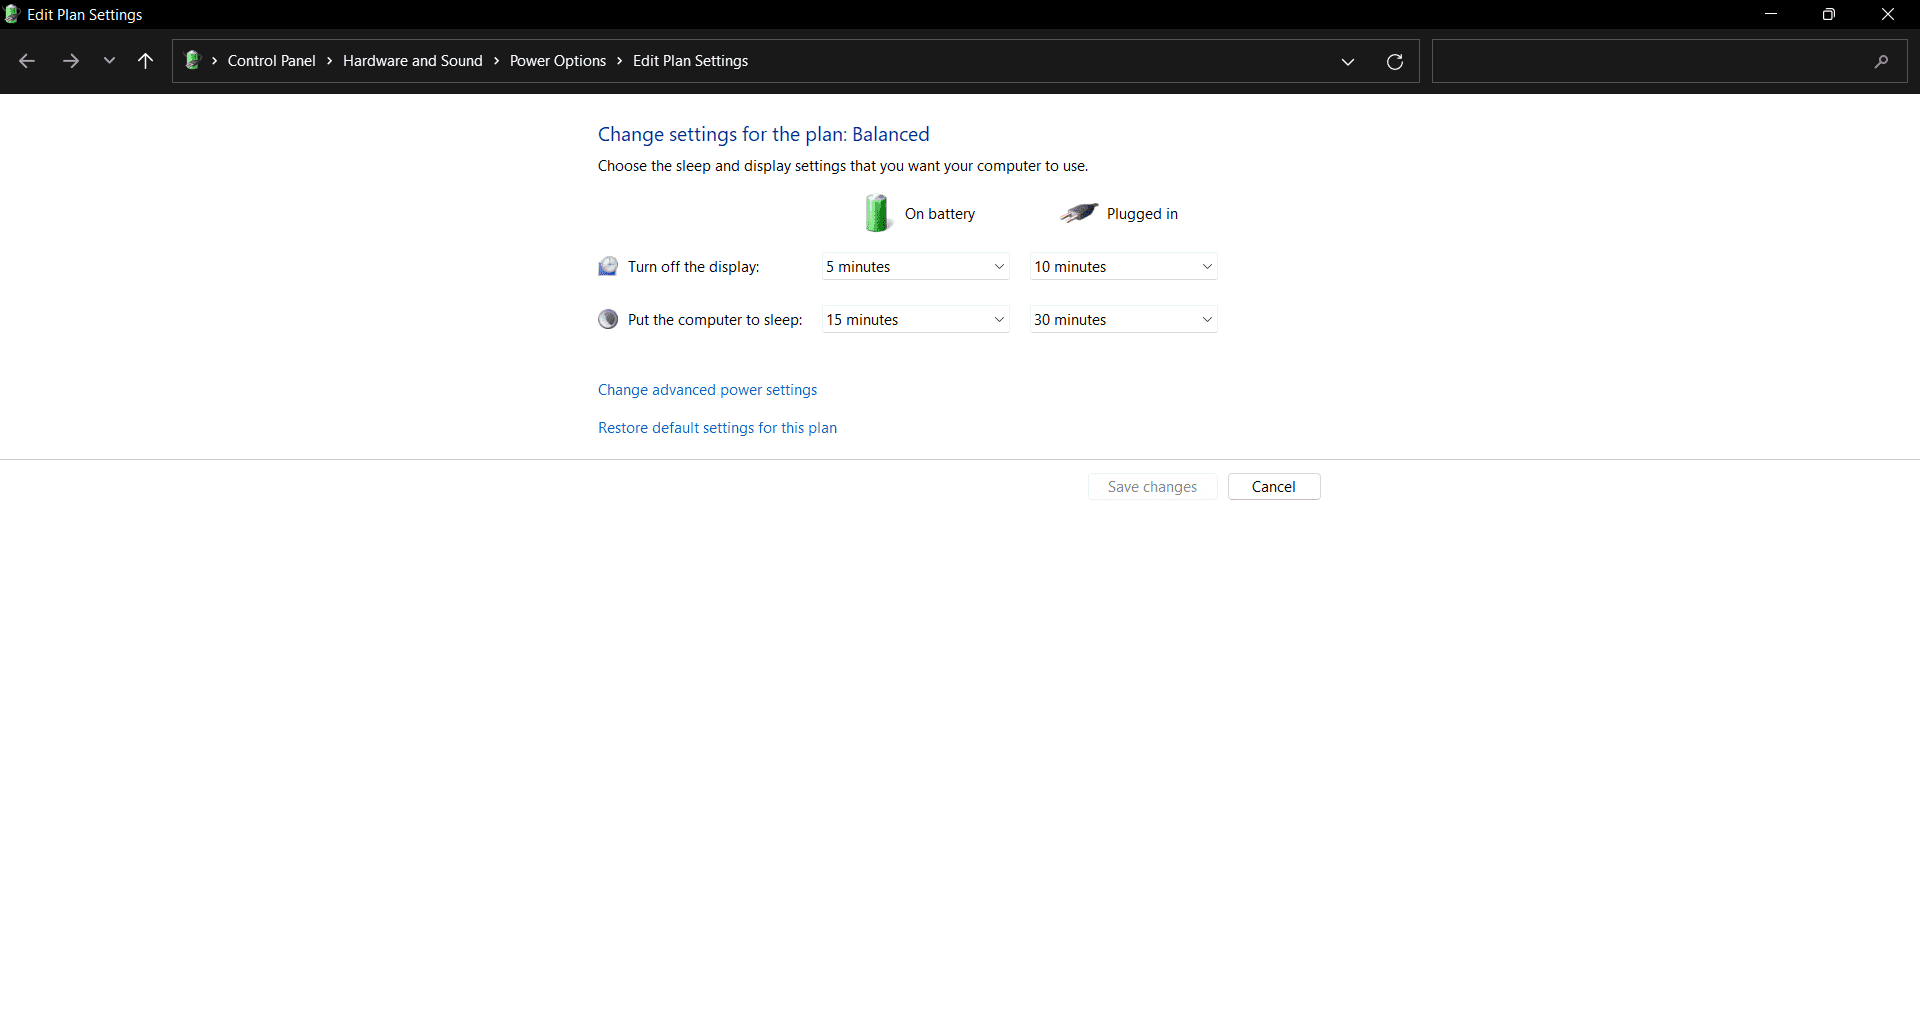
Open the Start Menu, and search for Edit Power Plan. Click on the Edit Power Plan in the Start Menu to open it.
Now on the window that opens up, click on Restore default settings for this plan. If asked to confirm changing the plan, confirm it, and then click on Save Changes.
This should change the power options, and you should be able to overcome the high CPU usage issue in Windows 11. RELATED GUIDES:
How To Update Network Drivers in Windows 11What is WSAPPX in Windows 11: Fix High CPU Disk UsageHow To Fix CPU Performance Issues and Lags In Windows 11How To Fix Print Spooler SubSystem App High CPU Usage
Conclusion
This is how you can fix the high CPU usage issues in Windows 11. If you experience performance lag or such problems which cause high CPU usage issues, then you can follow the above steps and you will be able to fix the issue you are facing.
Δ