Both large businesses and startups can get verified on Facebook. In this article, we’ll reveal the steps to get your Facebook page verified and also unveil 3 tips for a quick verification process. But first, let’s examine which Facebook verified badge is right for your business.
Choosing the Right Facebook Verification Badge
There are two types of verification badges available on Facebook: blue verification badge and gray verification badge.
Blue Verification Badge
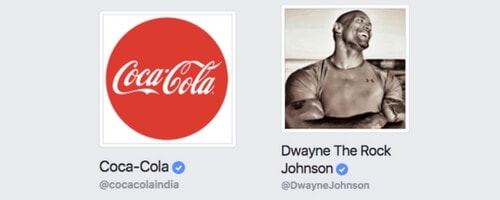
If you are a large business, well-known brand, or a media personality, you can apply for the blue verification badge.
Facebook blue verification badges are reserved for celebrities and large brands
Gray Verification Badge
If you are a startup or small business or own a brick and mortar shop, you can apply for the gray verification badge.
Facebook gray verification badges are mostly given to small businesses If you have multiple brick and mortar shops and a Facebook Page for each shop, you can add the gray verification badge to pages for specific locations.
How to Apply for Facebook Page Verification
You can apply for Facebook page verification in five simple steps: Step 1: Visit your Facebook page and click on Settings at the top of your Facebook Page Step 2: From the General menu, click the Page Verification selection
Step 3: Click on Verify this Page, then Get Started Step 4: Here, you’ll have two choices: the option to go for instant verification or a more detailed verification process. The instant verfication by Facebook is done through a call in which you’ll be given a verification code. The code has to be entered into the box Facebook provides you with. Once that’s done, Facebook will verify your page with the appropriate verification badge. Step 5: If you’d like to opt for a more detailed verification process, you need to click on Verify this Page with Documents Instead. You’ll be asked to upload a picture of the official document that clearly shows you company’s name and address. Facebook will then review the document and confirm or deny your request. This process usually takes anywhere from 2 to 45 days.
3 Tips to Get Your Facebook Page Verified Quickly
Now that you know how to apply for Facebook page verification, here are 3 tips to ensure a quick verification process.
1. Update Your Company Information and Keep It Accurate
The most basic aspect of a Facebook page is the company information. It doesn’t matter how regularly you post content on your page, how engaging your posts are, or how often you boost your posts. If your company information is incomplete or inaccurate, it’s highly unlikely that your Facebook page will be verified. You’ll need to ensure the following information on your page is up to date and accurate:
Website Email address Description Location Bio (Story) Working Hours
To ensure quick verification of your page by Facebook, ensure that you have an up to date link to your company website. You must also link to back to your Facebook page from your company website.
2. Keep It Professional
Facebook needs to recognize that your Facebook page is associated with your brand and business. As such, you need to ensure that the content posted on your page fits your brand image and buyer persona. Remove all content that negatively impact your credibility, including:
Off-brand posts or posts with low-quality images Posts containing typos, incorrect grammar, or an untidy copy Anything that goes against your brand image or buyer persona
3. Provide Additional Details
To ensure quick verification from Facebook, you need to provide as many details as possible about your business. Visit your page’s About section and fill out all the applicable details, including:
Phone number and email address Other social network handles Company overview Products Awards (if any) Office address
Over to You
Getting your Facebook page verified is a quick and simple process. Just following the simple steps above can help you establish more credibility for your brand and amplify the visibility for your business. If you liked this article, please share it on Twitter using the link below: [ctt template=”3″ link=”42cy1″ via=”yes” nofollow=”yes”]How to Get Your Facebook Page Verified: A Step-by-Step Guide[/ctt]
Best Times to Post on Social Media [Infographic] How to Advertise on Snapchat: A Detailed Guide to Snapchat Advertising How to Add Links to Your Instagram Stories to Drive Traffic and Sales Best Subreddits for Marketing: 25 Subreddits Every Marketer Should Join 5 Research-Backed Tactics to Get More Twitter Followers


